
How Can You Avoid Bubbles and Seams When Installing PVC Lamination Film? Pro Tips for Stagers and Installers
- Gevitt

- Dec 31, 2025
- 4 min read
Why Do “One Bubble + One Seam” Kill the Premium Look?

If you do cabinet wrap or door wrap work for staging, rentals, or quick-turn renovations, you’ve seen it: a tiny bubble becomes a bright “pimple” in side light, and a seam that looked “fine” suddenly flashes on camera. This guide is built around consistent, index-friendly terms—PVC lamination film, architectural film, and pressure-sensitive adhesive—so you can follow a repeatable process and reduce callbacks.
To prevent bubbles and visible seams with PVC lamination film, control temperature/humidity, prep the substrate until it’s clean + dry + smooth, apply with low tension using a center-out squeegee technique, and place seams outside glare angles. Expect pressure-sensitive adhesive to build bond strength as it “wets out,” so do a 24–72 hour re-check before final sign-off. (Marian Inc.)
Table of Contents
Installing PVC Lamination Film-Bubble-Free: Starts Before You Peel the Liner: Surface Prep + Climate Control
The 3 Bubble Causes You Can Control in Minutes
Most “mystery bubbles” come from (1) contamination, (2) moisture/porosity, or (3) cold substrate / unstable room conditions—not from the architectural film itself. Pressure-sensitive adhesive relies on intimate surface contact, so anything that blocks contact (oil, dust, dampness, texture) increases air entrapment risk. (Engineered Materials Inc.)
Use this fast prep standard for cabinet wrap and door wrap jobs:
Degrease, then de-dust: kitchens often have invisible oils; sanding creates micro-dust that traps air.
Dry and stabilize: avoid wrapping damp filler/MDF; let coatings fully dry/cure.
Flatten the substrate story: fill pinholes, feather chips, remove loose paint—film will telegraph defects.
Recommended reading (internal):
Cabinet-specific workflow: Cabinet Wrapping

Door profiles + edges: Door Wrapping Film

Authoritative educational link (non-competitive): For practical guidance on dust containment and ventilation during renovation-style work, see U.S. EPA — Best Practices for Indoor Air Quality when Remodeling Your Home. (US EPA)
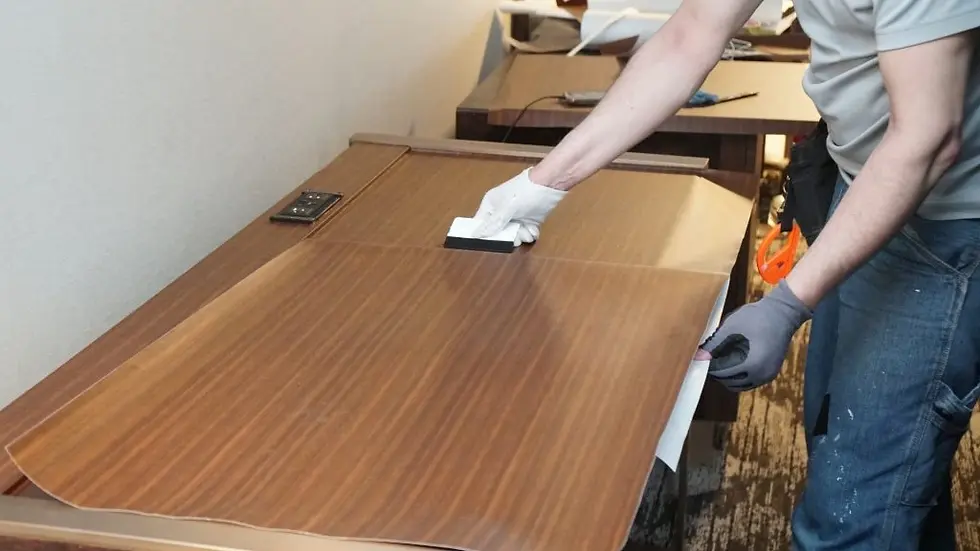
Pro Application Technique for Architectural Film: “Anchor → Float → Lock”
Stop Chasing Bubbles— Contact US
Use this sequence to reduce air entrapment and tension-related failures:
Anchor: tack a straight reference edge (hinge side for door wrap, a hidden return for cabinet wrap).
Float: lay the film with low tension—stretching to “force alignment” often leads to later shrink-back and edge lift.
Lock: squeegee center-out with overlapping strokes (consistent pressure > speed).
Heat Rule: Relax, Don’t Stretch
Use heat to soften and conform around edges/corners—then re-squeegee to lock contact. Don’t use heat to “pull” the film flat; that’s a common cause of next-day bubbles.
Pro reality check: many pressure-sensitive adhesive systems continue to wet out and build adhesion for up to ~72 hours, and some guidelines also note minimum application temperatures around 50°F (10°C) depending on adhesive type and construction. Always confirm your specific PVC lamination film datasheet. (Marian Inc.)

Troubleshooting Table: Bubbles + Seams (Fast Fixes You Can Use On-Site)
What you see on the PVC lamination film | Likely root cause | Fast fix (on-site) | Prevent it next job |
“Pepper” micro-bubbles | Dust / residue | Lift to clean contact line, wipe, re-lay | Final wipe + dust control |
Long “worm” bubble lines | Cold surface + air path | Lightly warm, lift back, re-squeegee | Control temp, center-out strokes |
Bubbles appear next day | Tension memory / incomplete wet-out | Early re-lift + reset contact | Low tension, proper pressure |
Seam flashes under window light | Seam in glare path | Move seam / change seam method | Plan seam away from light angle |
Seam edge lifting at corners | Insufficient conform + pressure | Warm to relax, press to set | Heat-to-conform + firm lock-down |
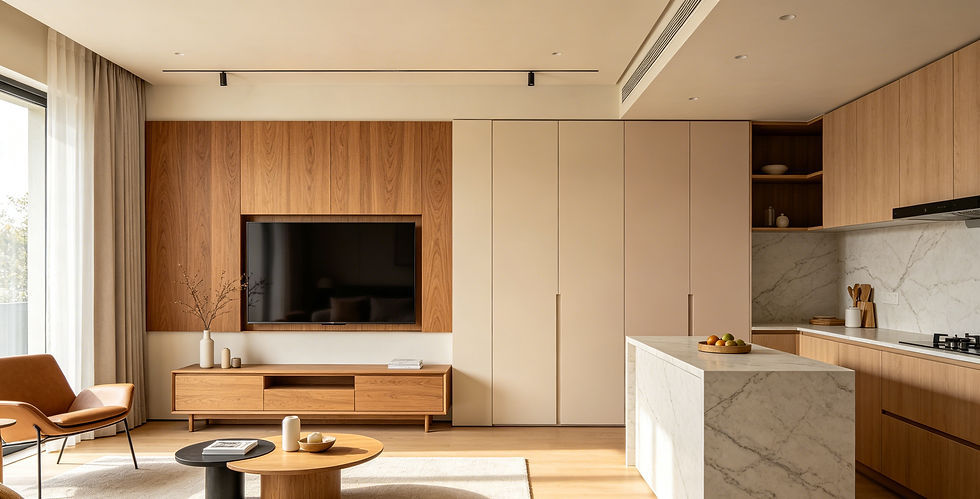
Seam Strategy for Cabinet Wrap and Door Wrap: Make Seams “Camera-Invisible”
Where Seams Disappear (and Where They Never Do)
Seams are easiest to hide when you plan for viewing angle + light direction:
Place seams on returns, shadow lines, or off-axis edges (not the center of a door/panel).
Avoid seams in the direct path of window light—that’s where “seam flash” happens.
For woodgrain/linear patterns, keep grain direction consistent across panels and doors.
Seam type shortcut:
Butt seam = cleanest visual line (best on stable, smooth substrates).
Micro-overlap = more forgiving when movement or shrink risk could expose a gap.
FAQ (Quick Answers)
What causes bubbles in PVC lamination film?
Most bubbles come from oil/dust, moisture/porosity, or cold/unstable conditions that reduce adhesive contact. (Engineered Materials Inc.)

Butt seam or overlap—what’s better for architectural film?
Use butt seams for the cleanest look; use micro-overlaps when durability and movement tolerance matter more than “perfectly invisible.” (Choose based on lighting + substrate stability.)
What temperature range is best for cabinet wrap and door wrap installation?
Many pressure-sensitive adhesive guidelines recommend avoiding cold installs and note minimums around 50°F (10°C) for certain PSA systems; optimal handling is often closer to comfortable room temperature. Confirm your product datasheet. (Marian Inc.)
When should I rework bubbles or seam lift?
Earlier is better. Adhesion typically increases as the pressure-sensitive adhesive wets out, so corrections are usually easier before full bond builds (often within 24–72 hours). (Marian Inc.)
How do I know if a seam will show in listing photos?
Do a side-light test with a handheld light at a low angle. If it flashes on-site, it will flash on camera.
Want “Listing-Photo Smooth” Results Without Rework?
If your goal is faster turns and fewer callbacks, standardize your workflow: control conditions → prep to smooth → low-tension laydown → center-out lock → edge conform + set → 24–72 hour re-check. If you share your substrate (MDF, laminate, painted wood) and job type (cabinet wrap vs door wrap), we can recommend a practical install checklist and seam-placement plan.
Email: support@giwett.com
WhatsApp/Phone: +86 15738309271
Website: giwett.com


Comments